Keeping track of your digital signage content and graphics is no easy task. Anyone who owns a smartphone knows what it’s like to scroll through row after row of images, trying to find that one photo. It’s no surprise that for enterprise teams, dealing with thousands of assets related to different campaigns, graphics management is even more of a headache.
At Enplug, we give users the ability to store an unlimited number of graphics and videos. That’s why we’ve made it even easier to manage the order of graphics in our Graphics & Video App with less clicking.

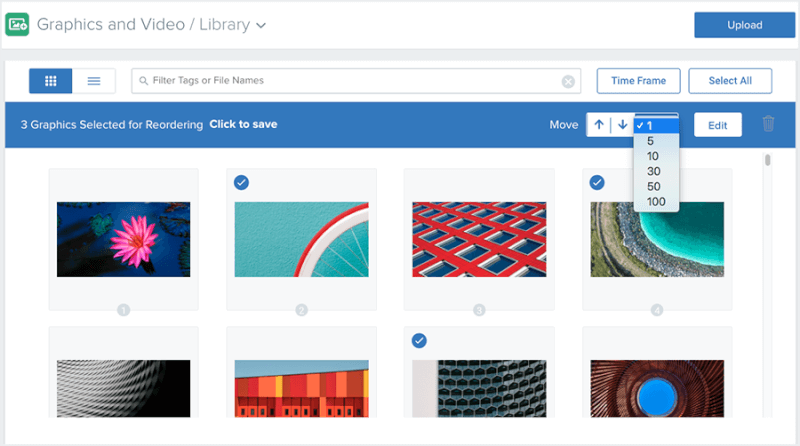
Changing the order of your graphics
Here are the options we’ve introduced for reordering your graphics:
- Drag and move one graphic at a time
- Drag and move multiple graphics as a group
- Move your graphic(s) up or down by a fixed number
- Enter a number in the box next to your graphic to put it in a specific order
We’ve added these graphic reordering options because we know it can be tough to keep on top of all of your content. Here are some additional tips to keep you organized and efficient:
1. Assign tags to your assets to sort and manage graphics quickly by keyword
Most of us are used to arranging content in folders, but at the end of the day, it’s a concept taken from the pre-digital world that just doesn’t work as efficiently with digital content.
Why? Because you can only put your document or file in one place. It’s always possible to use sub-folders, but with each each sub-folder your content is another click away from being accessible.
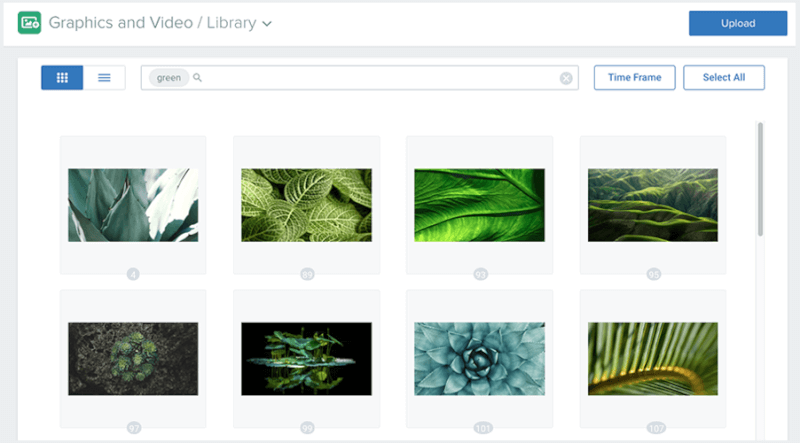
Using tags or labels lets you organize your content by keyword. To get started, map out your categories and then dig deep to think of all the possibilities.
2. Assign tags to your display groups to share your graphics on many screens at once
Managing multiple pieces of content is even more challenging when you’re also managing multiple displays. Enplug’s Display Groups make it easy – and fast – to control content across displays showing the same type of content.
For example, you might have a display group called “Mortgage Center Lobbies,” which includes all your displays in the lobbies of mortgage centers. It’s easy to filter your account graphics to the assets tagged “mortgage.” Then you can assign them to your “Mortgage Center Lobbies” display group.
Even better, Enplug also enables you to create tags for your display groups. So, you could create two display groups, “Mortgage Center Lobbies” and “Mortgage Center Back Office,” and then add the tag “mortgage” to both.
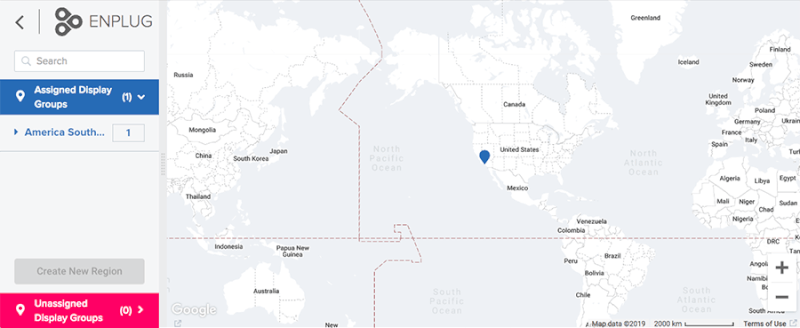
3. Assign your display groups to Regions to share graphics in a specific region or timezone
Local content can make all the difference when creating memorable customer and employee experiences. But ,what if you’re managing so many screens that you can’t remember exactly where they are?
Enplug’s custom-defined regions allow you to manage your display groups by location and view them on an interactive world map. For example, if your sales team is organized by region, you’ll want to share a dashboard that shows sales in each region. In the same way, if you have many car dealerships, you’ll want to share your “Winter Car Maintenance Checklist” exclusively in areas where the temperature dips below zero.